Have you ever tasted sushi and wondered how the rice is so perfectly sticky, fluffy, and subtly sweet? It’s not just any rice; it’s sushi rice, and mastering it is the first, most important step to crafting incredible sushi at home. Many home cooks shy away from attempting sushi, believing the rice preparation to be too difficult. But, with the right guidance and a little practice, you can achieve perfect sushi rice every single time.
This guide is your key to unlocking the secrets of amazing sushi rice. We will walk through all the details to help you create sushi rice like the professionals. You will learn about rice selection, washing techniques, precise cooking methods, and the art of creating the perfect sushi vinegar blend.
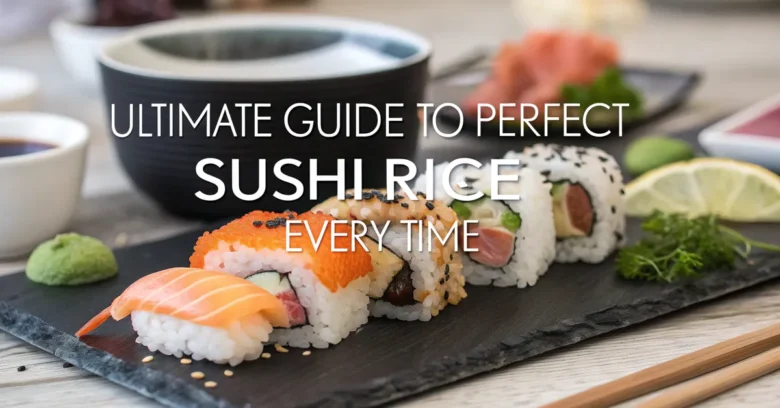
Understanding Sushi Rice: More Than Just Cooked Rice
Sushi rice, also known as sumeshi (酢飯) in Japanese, isn’t just about the type of grain. The real magic lies in the preparation. It is a combination of short-grain Japanese rice and a vinegar mixture. This mixture is the secret to that distinctive flavor that makes sushi so addictive. The taste and texture set sushi apart from other rice dishes.
Key Characteristics of Perfect Sushi Rice
- Slightly Sticky: Grains should cling together when pressed but not mushy.
- Fluffy: Each grain should retain its individual form and have a light, airy texture.
- Subtly Sweet and Tangy: The vinegar dressing provides a delicate balance of sweetness and acidity.
- Slightly Firm: The cooked rice should have a bit of “bite” without being hard.
- Pearly and Glossy: Properly cooked and dressed sushi rice will have a beautiful sheen.
Selecting the Right Rice: The Foundation of Great Sushi
Choosing the right rice is crucial. Not all rice is created equal, especially when it comes to sushi. The common mistake is to grab any bag of rice off the shelf.
Short-Grain Japanese Rice: The Only Choice
- Look for short-grain Japanese rice, often labeled as “sushi rice.” This variety has a higher starch content. That starch contributes to the desired stickiness.
- Avoid long-grain rice, like basmati or jasmine rice, which will result in a dry, separated texture. Medium-grain rice, like Arborio, may work in a pinch but won’t have the same authentic result.
- Common brands include Nishiki, Tamanishiki, and Kokuho Rose. These brands are reliable and widely available.
Why Short-Grain Matters
Short-grain rice contains more amylopectin. Amylopectin is a type of starch that gives the cooked rice its characteristic stickiness. Long-grain varieties are higher in amylose, a different starch that results in a drier, fluffier texture, which isn’t suitable for sushi.
Quality Matters: Freshness and Appearance
- Check the expiration date. Fresh rice will cook more evenly and have a better flavor.
- The grains should be plump, unbroken, and have a consistent, pearly white color. Avoid rice that looks dusty, cracked, or discolored.
The Washing Ritual: Removing Excess Starch
Washing the rice is a vital step that many home cooks skip, leading to gummy, unpleasant sushi rice. The goal is to remove excess surface starch.
Step-by-Step Washing Guide
- Measure the Rice: Use a kitchen scale for accuracy. A common ratio is 1 cup of uncooked rice to 1 1/4 cups of water, but adjust based on the specific rice and your cooker.
- Place in a Bowl: Transfer the measured rice to a large bowl.
- Add Cold Water: Cover the rice with cold water.
- Gentle Agitation: Use your hand to gently swirl the rice in the water. The water will become cloudy with starch.
- Drain: Carefully pour off the cloudy water, using your hand to prevent the rice from escaping.
- Repeat: Repeat the process of adding water, agitating, and draining. Usually, 5-7 times until the water is nearly clear.
- Final Rinse: Give the rice a final rinse under cold running water.
- Drain Well: Allow the rice to drain thoroughly in a fine-mesh sieve for at least 30 minutes. This step is important for the rice to cook properly.
Why Washing Is Necessary
Washing removes excess surface starch. The rice will become less sticky and more defined when cooked. This step is crucial for achieving the right texture.
The Cloudiness Test
The cloudiness of the water is the indicator. The cloudier the water, the more starch is being released. Continue washing until the water runs relatively clear.
Cooking Methods: Stovetop vs. Rice Cooker
Two primary methods exist for cooking sushi rice: the stovetop and the rice cooker. Both yield great results if done properly. The rice cooker provides consistent results with minimal effort.
Stovetop Method: Precision Required
- Combine Rice and Water: In a heavy-bottomed pot, combine the drained rice with the correct amount of water. The general rule is a 1:1.25 ratio of rice to water.
- Bring to a Boil: Place the pot over high heat and bring it to a rolling boil.
- Simmer: Once boiling, reduce the heat to the lowest setting. Cover the pot tightly and simmer for 18 minutes. It can vary according to the rice you use. Do not lift the lid during this time. This allows the rice to steam evenly.
- Rest: After 18 minutes, remove the pot from the heat and let it stand, still covered, for 10 minutes. This allows the rice to fully absorb the moisture.
- Fluff: Gently fluff the rice with a rice paddle or fork to separate the grains.
Rice Cooker Method: Consistency and Convenience
- Combine Rice and Water: Place the drained rice and the correct amount of water into the rice cooker.
- Cook: Close the lid and select the “white rice” or “sushi rice” setting.
- Rest: Once the rice cooker finishes, let the rice steam in the cooker for 10 minutes before opening the lid.
- Fluff: Gently fluff the rice with a rice paddle or fork.
Why the Right Water Ratio Matters
Too much water results in mushy rice. Too little results in dry, undercooked rice. Use precise measurements to ensure the perfect consistency.
The Importance of Resting
Resting allows the rice to fully absorb any remaining moisture. The grains become evenly hydrated. This results in a more consistent texture.
Crafting the Sushi Vinegar: The Flavor Key
The sushi vinegar (合わせ酢, awasezu) is what transforms plain cooked rice into sushi rice. The balance of sweet, sour, and salty flavors is essential.
Basic Sushi Vinegar Recipe
- 1/4 cup rice vinegar
- 2 tablespoons granulated sugar
- 1 teaspoon salt
Step-by-Step Vinegar Preparation
- Combine Ingredients: In a small saucepan, combine the rice vinegar, sugar, and salt.
- Heat Gently: Heat the mixture over low heat. Stir until the sugar and salt dissolve completely. Do not boil.
- Cool: Remove the saucepan from the heat and allow the mixture to cool to room temperature.
Adjusting for Taste
Feel free to adjust the ratio of sugar and salt to suit your preference. Some prefer a tangier vinegar with less sugar, while others like a sweeter blend. Start with the basic recipe and adjust to your taste.
Rice Vinegar: The Only Vinegar to Use
Rice vinegar has a mild, slightly sweet flavor. Other types of vinegar, such as white vinegar or apple cider vinegar, will overpower the delicate flavor of the sushi rice.
Combining Rice and Vinegar: The Art of Dressing
The key to perfect sushi rice lies in the careful and even distribution of the vinegar mixture. Overmixing can result in mushy rice, while undermixing will leave it unevenly flavored.
Essential Tools
- Hangiri (Wooden Sushi Rice Tub): A traditional wooden tub is ideal for cooling and mixing rice, as the wood absorbs excess moisture. If you do not have one, a large glass or plastic bowl will work.
- Shamoji (Rice Paddle): A flat rice paddle is used to gently mix the rice and vinegar without crushing the grains. A wooden or plastic paddle is preferred over metal.
Step-by-Step Dressing Guide
- Transfer Rice: Immediately transfer the hot, freshly cooked rice to the hangiri or bowl.
- Distribute Vinegar: Evenly drizzle the cooled sushi vinegar over the rice.
- Gentle Mixing: Using the shamoji, gently cut into the rice with a horizontal slicing motion. Then, turn the rice over to ensure even distribution of the vinegar. Avoid stirring or mashing the rice.
- Cooling: While mixing, use a fan to gently cool the rice. This helps the rice grains absorb the vinegar and develop a glossy sheen.
- Continue Mixing: Continue mixing and fanning until the rice is cooled to body temperature. The grains should be separate and slightly sticky.
Why a Wooden Tub Is Preferred
The wood helps absorb excess moisture from the rice, preventing it from becoming soggy. The wide, shallow shape of the tub also allows the rice to cool quickly and evenly.
The Cutting Motion
The cutting motion with the rice paddle is essential. It helps to separate the grains while evenly distributing the vinegar without crushing the rice.
Fanning for Perfect Texture
Fanning helps the rice cool quickly. This step is vital for achieving the correct texture. Rapid cooling prevents overcooking and encourages the rice to absorb the vinegar evenly.
Troubleshooting: Common Mistakes and Solutions
Even with the best instructions, mistakes can happen. The important is knowing how to identify them and correct them.
Problem: Mushy Rice
- Cause: Too much water during cooking, overmixing after adding vinegar, or insufficient washing of the rice.
- Solution: Use the correct water ratio. Gently mix the rice with a cutting motion. Do not overmix. Ensure the rice is washed thoroughly to remove excess starch.
Problem: Dry Rice
- Cause: Too little water during cooking, overcooking, or insufficient vinegar.
- Solution: Use the correct water ratio. Avoid overcooking the rice. Add a bit more vinegar mixture to achieve the desired flavor and moisture.
Problem: Uneven Flavor
- Cause: Uneven distribution of the vinegar mixture.
- Solution: Drizzle the vinegar evenly over the rice. Gently mix with a cutting motion to ensure all grains are coated.
Problem: Rice Is Too Hard
- Cause: Undercooking or using the wrong type of rice.
- Solution: Make sure to use short-grain Japanese rice. Slightly increase the cooking time. Ensure the pot is tightly covered during cooking to trap steam.
Storing Sushi Rice: Keeping It Fresh
Proper storage is essential to maintain the quality and texture of your sushi rice if you are not using it immediately.
Short-Term Storage (Up to a Few Hours)
- Keep the rice covered with a damp cloth to prevent it from drying out. Store it at room temperature.
- Avoid refrigerating the rice, as this will make it hard and unpalatable.
Longer-Term Storage (Up to 24 Hours)
- If you need to store the rice for longer, spread it out in a shallow container. Cover it with a damp cloth. Refrigerate it.
- Before using, gently steam the rice or microwave it with a splash of water to rehydrate it.
The Damp Cloth Trick
The damp cloth creates a humid environment. It prevents the rice from drying out. This helps maintain its texture and moisture.
Beyond the Basics: Flavor Variations
Once you’ve mastered the basic sushi rice recipe, feel free to experiment with different flavor variations.
Infused Vinegars
Infuse your rice vinegar with ingredients like kombu (dried kelp), yuzu zest, or ginger for a more complex flavor profile.
Sesame Seeds and Furikake
Add toasted sesame seeds or furikake (a Japanese rice seasoning mix) to the cooked rice for added texture and flavor.
Different Sugars
Experiment with different types of sugar, such as brown sugar or honey, for a slightly different sweetness.
The Secret Ingredient: Patience
Making perfect sushi rice requires patience and practice. The more you make it, the better you’ll become at judging the correct water ratio, mixing technique, and flavor balance. Don’t be discouraged if your first batch isn’t perfect. Keep practicing.
Elevate Your Sushi Creations
Mastering the art of sushi rice opens the door to countless sushi creations. From classic nigiri and maki rolls to creative temaki and chirashi bowls, the possibilities are endless.
Ready to Roll?
With this guide, you are now equipped to create sushi rice like the professionals. You can produce sushi rice that tastes good and feels great in your mouth. Get ready to impress your friends and family. You can serve them homemade sushi that rivals the best restaurants. Don’t hesitate to buy those ingredients and start your culinary adventure. It may be more than just rice and vinegar.