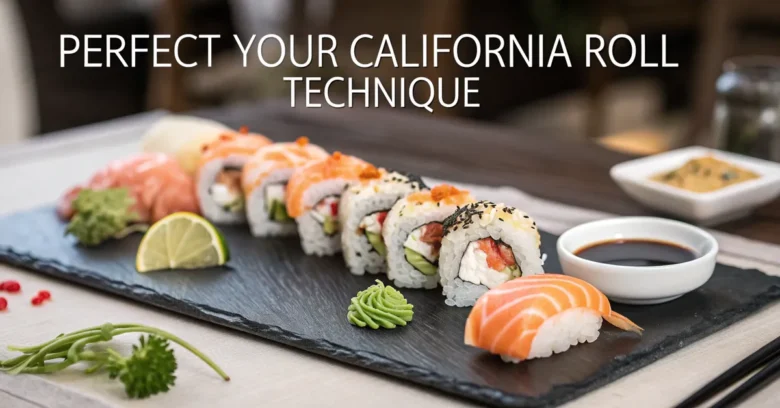
The california roll is the gateway sushi. Maybe you tried it once, or maybe a hundred times. It’s that familiar blend of avocado, crab (or imitation crab), and cucumber, often embraced by a comforting layer of rice and nori. But have you ever thought about mastering the art of making it yourself?
More than just a recipe, crafting the california roll at home is a skill. It opens a path to endless sushi adventures in your own kitchen. Are you ready to go beyond the takeout menu and perfect your california roll technique?
This guide provides every detail you need to create california rolls like a pro. Forget the struggle, embrace the roll!
Gather Your California Roll Arsenal
Before diving into the rolling process, gathering the right ingredients and tools is key to a smooth sushi-making experience. Quality ingredients elevate the taste, while the right tools make the process more efficient and enjoyable.
Essential California Roll Ingredients
- Sushi Rice: The foundation of any great roll. Short-grain Japanese rice is best. The ideal sushi rice has a slightly sweet and vinegary taste, and a sticky texture that allows it to hold its shape.
- Rice Vinegar: This is the magic ingredient for flavoring sushi rice. Seasoned rice vinegar is a convenient option, or you can create your own mixture of rice vinegar, sugar, and salt.
- Nori Seaweed: These dried seaweed sheets provide the outer wrapping. To ensure a good sushi roll, they should be crisp and slightly toasted.
- Imitation Crab (Surimi): The classic california roll filling. Look for high-quality imitation crab that has a sweet flavor and firm texture.
- Avocado: The creamy element. Choose ripe but firm avocados for the best texture and flavor.
- Cucumber: Adds a crisp, refreshing contrast. Opt for seedless cucumbers or remove the seeds to prevent the roll from becoming watery.
- Sesame Seeds (Optional): For added flavor and visual appeal. White or black sesame seeds can be used.
- Mayonnaise (Optional): Some like a touch of mayo for extra creaminess. Japanese mayo (Kewpie) is a popular choice, it adds richness with a tangy flavor.
Tools of the Trade
- Sushi Rolling Mat (Makisu): This bamboo mat is essential for shaping the roll. Wrap it in plastic wrap to prevent rice from sticking.
- Rice Cooker (Optional): A rice cooker ensures perfectly cooked sushi rice every time, but you can also cook it on the stovetop.
- Mixing Bowl: For seasoning the sushi rice. A wooden bowl is ideal, as it helps absorb excess moisture.
- Spatula or Rice Paddle (Shamoji): For gently mixing and folding the rice without crushing it.
- Sharp Knife: For clean, precise cuts. Wet the knife blade to prevent the rice from sticking.
- Cutting Board: A stable surface for cutting the sushi rolls.
- Small Bowl of Water: For keeping your fingers moist to prevent the rice from sticking.
Mastering Sushi Rice: The Heart of the California Roll
Sushi rice isn’t just plain cooked rice; it’s a carefully prepared element that brings the whole roll together. Correct texture, taste, and temperature are key.
The Rice-to-Water Ratio
The right rice-to-water ratio is key. Too little water, and you’ll have dry, hard rice. Too much water, and it’ll be mushy.
- Stovetop: A 1:1 ratio (e.g., 1 cup rice to 1 cup water) usually works well.
- Rice Cooker: Follow the manufacturer’s instructions.
Cooking Methods Demystified
Stovetop Method:
- Rinse the rice: Place the rice in a fine-mesh sieve and rinse under cold water until the water runs clear. This removes excess starch.
- Combine rice and water: In a pot, combine the rinsed rice and water.
- Bring to a boil: Bring the mixture to a boil over high heat, then immediately reduce the heat to low, cover, and simmer for 18 minutes.
- Rest: Remove the pot from the heat and let it stand, covered, for 10 minutes. This allows the rice to steam and fully absorb the water.
Rice Cooker Method:
- Rinse the rice: As with the stovetop method, rinse the rice until the water runs clear.
- Add rice and water to the cooker: Place the rinsed rice and water into the rice cooker.
- Cook: Cook according to the rice cooker’s instructions.
- Rest: Once cooked, let the rice stand in the rice cooker for 10 minutes.
The Vinegar Elixir: Seasoning Your Rice
While the rice is cooking, prepare the rice vinegar mixture. This is what gives sushi rice its unique taste.
Basic Rice Vinegar Mixture:
- 1/4 cup rice vinegar
- 2 tablespoons sugar
- 1 teaspoon salt
Instructions:
- Combine the ingredients in a small saucepan.
- Heat over low heat, stirring until the sugar and salt dissolve. Do not boil.
- Let the mixture cool slightly.
Combining Rice and Vinegar: A Delicate Balance
- Transfer the rice: Once the rice is cooked and rested, gently transfer it to a large mixing bowl (preferably wooden).
- Add the vinegar mixture: Pour the rice vinegar mixture over the rice.
- Mix gently: Using a spatula or rice paddle, gently fold the vinegar mixture into the rice. Be careful not to crush the rice grains.
- Cool the rice: Fan the rice with a fan or piece of cardboard while continuing to gently mix. This helps cool the rice quickly and evenly. You want the rice to be lukewarm, not hot.
Why is cooling important?
Warm rice will make the nori soggy. The rice needs to be cooled to a safe temperature before assembling your california rolls.
Inside-Out: The California Roll Technique
The california roll is an uramaki style sushi, which translates to “inside-out roll”. This means the rice is on the outside and the nori is on the inside. It might seem tricky, but with a few tips, you’ll get the hang of it.
Preparing the Nori
- Cut the nori: Place a sheet of nori on a cutting board and use a sharp knife to cut it in half crosswise. You’ll use one half-sheet of nori per roll.
Rice Placement: A Sticky Situation
- Prepare the rolling mat: Cover your sushi rolling mat with plastic wrap. This prevents the rice from sticking to the mat.
- Moisten your hands: Keep a small bowl of water nearby and moisten your fingers. This will prevent the rice from sticking to your hands.
- Spread the rice: Take a handful of seasoned sushi rice (about 1 cup) and gently spread it evenly over the plastic wrap-covered rolling mat.
- Flip and position the nori: Carefully flip the rice-covered mat so that the rice is facing down on a clean surface. Place the nori sheet on top of the plastic wrap, centered.
Filling the Roll: The Flavor Zone
- Arrange the fillings: Arrange a line of imitation crab, avocado, and cucumber across the center of the nori sheet. Don’t overfill, as this will make it difficult to roll.
- Add mayonnaise (optional): If you like, drizzle a small amount of Japanese mayonnaise over the fillings.
Rolling with Confidence
- Lift the edge of the mat: Using the rolling mat, lift the edge closest to you and begin rolling the sushi.
- Tuck and roll: Gently tuck the edge of the mat over the fillings and press firmly to create a tight roll.
- Continue rolling: Continue rolling the mat forward, keeping the roll tight.
- Seal the roll: Once you’ve rolled the entire mat, give the roll a final squeeze to seal it.
- Remove the mat: Carefully remove the rolling mat and plastic wrap from the roll.
Sesame Seed Shower (Optional)
- Sprinkle sesame seeds: If desired, sprinkle sesame seeds evenly over the rice on the outside of the roll. Gently press the seeds into the rice so they adhere.
Cutting and Serving: The Final Flourish
- Prepare your knife: Wet a sharp knife with water to prevent the rice from sticking.
- Cut the roll: Place the roll on a cutting board and cut it in half. Then, cut each half into 3-4 equal pieces.
- Serve immediately: Serve the california rolls immediately with soy sauce, wasabi, and pickled ginger.
Beyond the Basics: Variations and Expert Tips
Once you’ve mastered the classic california roll, feel free to experiment. Here are some ideas to elevate your sushi game:
Filling Fiesta
- Smoked Salmon: Adds a smoky richness.
- Cooked Shrimp: A classic alternative to crab.
- Cream Cheese: For extra creaminess.
- Mango: A sweet and tangy twist.
- Spicy Mayo: Mix mayonnaise with sriracha for a kick.
Rice Remix
- Brown Rice: A healthier option with a nutty flavor.
- Black Rice: A visually striking choice with a slightly chewy texture.
Toppings and Textures
- Masago (Smelt Roe): Adds a briny pop of flavor and texture.
- Tempura Flakes: For a crispy crunch.
- Eel Sauce (Unagi Sauce): A sweet and savory glaze.
Pro-Level Tips
- Rice Quality: Invest in high-quality sushi rice for the best results.
- Even Rice Distribution: Make sure the rice is spread evenly on the nori for a consistent roll.
- Tight Rolling: A tight roll is key to preventing the roll from falling apart.
- Sharp Knife: A sharp, wet knife is essential for clean cuts.
- Freshness: Use the freshest ingredients possible for the best flavor.
- Presentation: Arrange the rolls artfully on a plate for a restaurant-quality presentation.
Troubleshooting Your California Roll
Even with the best instructions, sushi-making can sometimes be tricky. Here are some common problems and how to fix them:
- Rice is too sticky: Rinse the rice more thoroughly before cooking.
- Rice is too dry: Add a little more water when cooking the rice.
- Roll is falling apart: Make sure you’re rolling the sushi tightly.
- Nori is soggy: Don’t overfill the roll and make sure the rice is cooled before rolling.
- Difficulty Cutting: Ensure the knife is sharp and wet between each cut.
Health and Nutrition: A Balanced Bite
While california rolls can be a tasty treat, it’s helpful to consider their nutritional profile.
- Calories: A typical california roll contains around 250-350 calories.
- Carbohydrates: Mostly from the rice, providing energy.
- Protein: From the imitation crab, important for muscle building and repair.
- Fat: From the avocado, providing healthy fats.
- Sodium: Can be high due to soy sauce and processed ingredients.
Tips for a Healthier Roll:
- Brown Rice: Use brown rice for added fiber.
- Real Crab: Substitute imitation crab with real crab for a boost in nutrients.
- Less Sodium: Use low-sodium soy sauce.
- More Veggies: Add more vegetables like carrots or bell peppers.
California Roll Around the World: Cultural Context
The california roll holds a special place in sushi history. It’s widely credited as being one of the first sushi rolls adapted to Western tastes.
- Origin: Often attributed to a chef in Los Angeles in the 1960s or 1970s, it was created as an alternative to raw fish, which was not widely accepted at the time.
- Impact: It played a huge role in popularizing sushi in North America and beyond.
- Evolution: It paved the way for other creative sushi rolls and fusion cuisine.
Common Mistakes to Avoid for California Roll Perfection
Making california rolls can be a rewarding experience, but it’s easy to stumble without the right knowledge. Here are common mistakes to avoid:
- Overcooked or Undercooked Rice: The consistency of your rice is the base upon which your roll is made. Ensure proper cooking by adhering to the correct water ratio and cooking time.
- Using the Incorrect Kind of Rice: Short-grain Japanese rice is the standard for sushi. Do not substitute with long-grain or other varieties.
- Soggy Nori: Avoid using rice that is still too warm, as it will make the nori soggy.
- Inconsistent Cutting: A sharp, wet knife will allow for a better slice. Remember to clean your blade after each cut.
- Uneven Filling: A uniform distribution will ensure each bite tastes delicious.
Essential Tools and How They Impact Your Results
The right tools can turn the process of crafting sushi rolls into a smooth, efficient experience. Here’s how each tool helps:
- Sushi Rolling Mat: The bamboo sushi rolling mat is necessary for forming the roll. Without it, the task becomes increasingly difficult.
- Sharp Knife: A sharp knife allows for clean cuts.
- Rice Cooker: A rice cooker ensures consistently perfect sushi rice.
- Wooden Mixing Bowl: The wooden bowl will allow the rice to dry, making the roll better.
Frequently Asked Questions About California Rolls
Here are frequently asked questions about making california rolls at home:
- Can I use regular rice instead of sushi rice? No, regular rice will not have the same texture or flavor as sushi rice. Short-grain Japanese rice is essential.
- How do I store leftover california rolls? Store leftover california rolls in an airtight container in the refrigerator. They are best consumed within 24 hours.
- Can I make california rolls ahead of time? Yes, you can make california rolls a few hours ahead of time. Wrap them tightly in plastic wrap and store them in the refrigerator.
- Where can I buy sushi-making supplies? You can find sushi-making supplies at Asian grocery stores, specialty food stores, and online retailers.
Is Mastering the California Roll Worth It?
Perfecting your california roll technique is more than just learning a new recipe. It’s about opening a door to a world of culinary creativity and enjoying fresh, homemade sushi whenever you crave it. Plus, there’s a special satisfaction that comes from crafting something delicious with your own hands. So, grab your ingredients, gather your tools, and get rolling! You’ll find joy in making the perfect california roll.