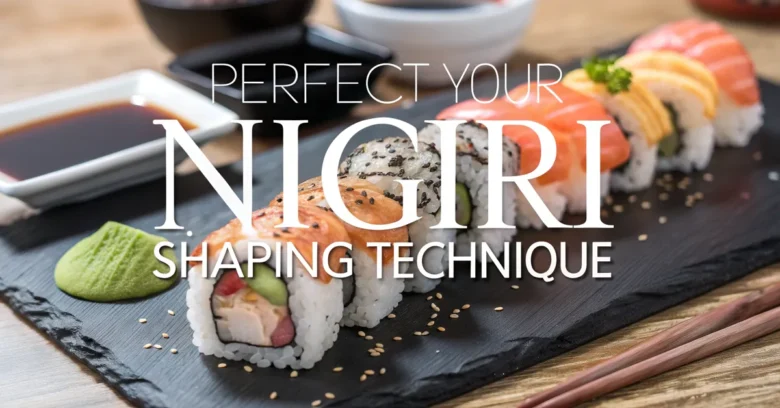
Crafting perfect nigiri is an art. But unlike a painting, you can’t just hang it on a wall; it needs to taste as good as it looks. Have you ever felt that your nigiri just wasn’t quite “there?” Maybe the rice fell apart, or the fish slid right off. You’re not alone. Many sushi chefs, even those with experience, face challenges perfecting their nigiri technique.
This article aims to bridge the gap between good and exceptional nigiri. We will explore essential steps for intermediate sushi makers, which are usually self-taught or learned from another cook with no formal culinary education. We will dive deep, sharing insights into the nigiri technique that elevates your sushi. You’ll discover pro tips and tricks to achieve that perfect balance of rice, fish, and wasabi every single time.
Understanding the Essence of Nigiri
Nigiri, in its simplest form, is a slice of fish (or other topping) draped over a small, oblong mound of seasoned sushi rice. But this simplicity belies the technical skill required to make truly excellent nigiri. Each piece is more than just food; it’s an edible sculpture, a testament to the chef’s precision and understanding of ingredients.
To truly master nigiri technique, you need to understand the fundamental principles that underpin it. These principles cover everything from rice preparation to the final shaping of the nigiri.
The Rice: Foundation of Nigiri
The rice is more than just a base; it’s the soul of nigiri. Get the rice wrong, and the whole experience falls apart. The right rice is slightly sticky, with each grain holding its shape while still being soft and yielding in the mouth.
Selecting the Right Rice
Choosing the correct type of rice is the first step. Look for short-grain Japanese sushi rice. Brands like Tamanishiki or Koshihikari are excellent choices. These varieties have the ideal starch content for achieving that perfect balance of stickiness and separation.
Perfecting the Cooking Process
Cooking sushi rice is an art, and consistency is key. Follow these steps:
- Rinse: Rinse the rice thoroughly under cold water until the water runs clear. This removes excess starch that can make the rice gummy.
- Cook: Use a rice cooker or a pot with a heavy bottom. Add the rice and the appropriate amount of water (usually a 1:1.1 ratio of rice to water).
- Steam: Let the cooked rice steam, covered, for about 10–15 minutes.
Mastering the Sushi Vinegar (Awasezu)
Sushi vinegar, or awasezu, is what gives sushi rice its characteristic flavor. A basic recipe includes:
- Rice vinegar
- Sugar
- Salt
The ratio is crucial. A common starting point is 5 parts vinegar, 3 parts sugar, and 1 part salt. But adjust to your personal taste. Heat the mixture gently until the sugar and salt dissolve, but don’t boil it.
Combining Rice and Vinegar
The process of combining the cooked rice and vinegar is critical.
- Transfer: Move the hot rice to a hangiri, a wooden sushi rice tub.
- Incorporate: Sprinkle the vinegar mixture over the rice while gently separating the grains with a rice paddle (shamoji).
- Cool: Fan the rice while mixing to cool it down quickly. The ideal temperature is around body temperature.
The Fish: Selecting and Preparing the Neta
The fish, or neta, is the star of the nigiri show. Its quality, freshness, and preparation are paramount.
Sourcing Fresh, High-Quality Fish
Always source your fish from reputable suppliers who specialize in sushi-grade seafood. Look for these qualities:
- Appearance: Vibrant color, no dullness.
- Smell: Fresh, clean sea aroma, not fishy.
- Texture: Firm, elastic to the touch.
Understanding Different Cuts
Different cuts of fish offer unique textures and flavors. Here are a few popular options:
- Maguro (Tuna): Akami (lean), chutoro (medium fatty), otoro (very fatty).
- Sake (Salmon): Rich, buttery flavor.
- Hamachi (Yellowtail): Clean, slightly firm texture.
Slicing with Precision
The way you slice the fish affects both its appearance and texture. Use a sharp knife and follow these tips:
- Angle: Slice at a slight angle to increase the surface area of the fish.
- Thickness: Aim for consistent thickness, about ¼ inch.
- Motion: Use a single, smooth slicing motion.
Shaping the Nigiri: The Heart of Technique
This is where the nigiri technique truly comes into play. Shaping nigiri requires a delicate balance of pressure, precision, and speed.
Preparing Your Hands
Before you even touch the rice, prepare your hands.
- Clean: Wash your hands thoroughly.
- Wet: Keep your hands slightly damp with tezu, a mixture of water and a little rice vinegar. This prevents the rice from sticking to your hands.
The Basic Shaping Technique: Hand movements
This is the most common method. Follow these steps:
- Portion: Gently grab a small amount of rice (about 20 grams) with your fingers.
- Form: Gently form the rice into an oblong shape using your palms.
- Indent: Use your index finger to create a small indentation on top of the rice.
- Combine: Place the fish on top of the rice and gently press it down to adhere.
Mastering Pressure and Shape
The pressure you apply is critical. Too much, and the rice will become compacted and gummy. Too little, and it will fall apart.
- Gentle: Aim for gentle, even pressure.
- Oblong: Maintain an elegant, elongated shape.
- Balanced: Ensure the rice and fish are proportionally balanced.
Adding Wasabi: A Subtle Touch
Wasabi adds a subtle kick that complements the flavors of the fish and rice.
- Placement: Apply a small dab of wasabi between the fish and the rice.
- Amount: Use sparingly, as too much can overpower the other flavors.
Advanced Nigiri Techniques
Once you’ve mastered the basics, you can explore advanced techniques that add extra flair to your nigiri.
Incorporating Textures
Experiment with different textures to elevate your nigiri.
- Seared: Lightly sear the fish with a culinary torch for a smoky flavor and caramelized texture.
- Marinated: Marinate the fish in soy sauce, sake, or other flavorful liquids for a richer taste.
- Torched: Quickly torching the fish oil will create unique flavors to the fish.
Mastering Different Styles of Nigiri
Different regions and chefs have their own unique styles of nigiri.
- Edomae: Traditional Tokyo-style nigiri, often featuring marinated or cured fish.
- Osaka: Pressed sushi (oshi-zushi) with a rectangular shape.
- Contemporary: Modern interpretations with creative toppings and sauces.
Presentation: Plating with Purpose
Presentation is the final touch that elevates your nigiri.
- Arrangement: Arrange the nigiri artfully on a plate, considering color and balance.
- Garnish: Use simple garnishes like ginger, wasabi, or a sprig of shiso to add visual appeal.
- Cleanliness: Ensure the plate is clean and free of smudges or drips.
Common Mistakes and How to Avoid Them
Even experienced sushi chefs can make mistakes. Here are a few common pitfalls and how to avoid them:
Rice Too Sticky or Too Dry
- Cause: Incorrect rice-to-water ratio, improper rinsing, or incorrect vinegar mixture.
- Solution: Adjust the rice-to-water ratio, rinse the rice thoroughly, and refine your vinegar mixture.
Fish Slipping Off
- Cause: Insufficient pressure, too much moisture on the fish, or incorrect slicing technique.
- Solution: Apply gentle, even pressure, pat the fish dry before combining, and refine your slicing technique.
Nigiri Falling Apart
- Cause: Rice too dry, not enough pressure, or improper shaping technique.
- Solution: Adjust the moisture content of the rice, apply gentle, even pressure, and refine your shaping technique.
Overuse of Wasabi
- Cause: Too much enthusiasm with the wasabi.
- Solution: Use wasabi sparingly, as too much can overpower the other flavors.
Tools of the Trade: Essential Equipment
Having the right tools can make a big difference in your nigiri technique.
- Sushi Knife (Yanagiba): A long, thin knife for slicing fish with precision.
- Rice Paddle (Shamoji): A flat paddle for mixing and serving rice.
- Sushi Rolling Mat (Makisu): Although not used directly for nigiri, it’s essential for other types of sushi and helps maintain a well-equipped sushi kitchen.
- Hangiri: A wooden tub for cooling and seasoning rice.
- Cutting Board: A clean, stable surface for slicing fish.
Perfecting Your Nigiri in a Plant-Based Kitchen
While traditional nigiri relies on fish, you can adapt the same techniques to create stunning plant-based versions. This opens up a world of possibilities for vegetarian and vegan sushi lovers.
Innovative Plant-Based Toppings
The key to delicious plant-based nigiri is to use creative and flavorful toppings that mimic the textures and flavors of fish.
- Tomato “Tuna”: Marinated and thinly sliced tomatoes can mimic the color and texture of tuna.
- Avocado: Offers a creamy, buttery texture similar to salmon.
- Eggplant “Eel”: Grilled and glazed eggplant can mimic the flavor and texture of eel.
- Tofu: Tofu has a very mild flavor, and takes on a slightly different flavor depending on the preparation.
- Other Options: Shiitake mushrooms, marinated carrots, bell peppers, grilled asparagus, and other plant-based ingredients.
Adapting Preparation Techniques
Many of the same preparation techniques apply to plant-based toppings.
- Slicing: Slice the toppings thinly and evenly for optimal texture and presentation.
- Marinating: Marinate the toppings in flavorful sauces to enhance their taste.
- Grilling/Searing: Grill or sear the toppings to add depth of flavor.
Flavor Combinations to Explore
Experiment with different flavor combinations to create unique and exciting plant-based nigiri.
- Tomato “Tuna” with Balsamic Glaze: The sweetness of the balsamic glaze complements the acidity of the tomato.
- Avocado with Sesame Seeds and Soy Sauce: A simple yet satisfying combination.
- Eggplant “Eel” with Teriyaki Sauce: A classic pairing that mimics the traditional eel nigiri.
- Tofu with Kimchi: A savory and spicy combination.
Examples of Plant-Based Nigiri
- Marinated Tomato Nigiri: Slices of marinated tomato arranged on top of sushi rice.
- Avocado Nigiri: Thinly sliced avocado draped over sushi rice.
- Grilled Eggplant Nigiri: Grilled eggplant brushed with teriyaki sauce served on sushi rice.
By using these innovative techniques, you can create delicious and visually appealing plant-based nigiri that caters to a wider audience.
The Science Behind Perfect Nigiri
Beyond the artistry and technique, there’s a science to making perfect nigiri. Understanding these scientific principles can help you troubleshoot problems and refine your nigiri technique.
Understanding Starch Gelatinization
Starch gelatinization is the process by which starch granules absorb water and swell when heated. This is what gives cooked sushi rice its characteristic texture.
- Temperature: The ideal gelatinization temperature for rice starch is between 62°C and 78°C (144°F and 172°F).
- Water: Sufficient water is necessary for the starch granules to absorb and swell.
- Time: The rice needs to be cooked for a sufficient amount of time to allow complete gelatinization.
The Role of Acidity in Flavor
The acidity of the sushi vinegar plays a crucial role in the overall flavor of the nigiri.
- Balance: The acidity balances the sweetness of the rice and complements the flavor of the fish.
- Preservation: Acidity also helps to preserve the rice and prevent bacterial growth.
- Flavor enhancement: It enhances the umami flavor of the ingredients.
Emulsification: Creating a Smooth Sauce
Emulsification is the process of combining two immiscible liquids, such as oil and water, into a stable mixture. This is important for creating smooth and flavorful sauces for your nigiri.
- Emulsifiers: Emulsifiers, such as egg yolk or mustard, help to stabilize the mixture.
- Technique: Slowly drizzle the oil into the water while whisking vigorously to create a stable emulsion.
The Maillard Reaction
The Maillard reaction is a chemical reaction between amino acids and reducing sugars that occurs when food is heated. This reaction is responsible for the browning and flavor development in seared or grilled fish.
- Temperature: The Maillard reaction occurs at temperatures above 140°C (284°F).
- Moisture: Low moisture content promotes the Maillard reaction.
- Ingredients: The presence of amino acids and reducing sugars is necessary for the Maillard reaction to occur.
By understanding these scientific principles, you can gain a deeper appreciation for the complexities of nigiri technique and refine your approach to create even better sushi.
The Zen of Nigiri: Mindfulness and Mastery
Beyond the technical aspects, there’s a certain Zen to making nigiri. It requires focus, patience, and a deep appreciation for the ingredients. It’s about being present in the moment and allowing your intuition to guide you. When you approach nigiri making with mindfulness, the results will reflect your care and attention.
Continuing the Journey
Mastering the nigiri technique is a continuous journey. There’s always more to learn, more to refine, and more to explore. So, keep practicing, keep experimenting, and keep pushing yourself to improve. The rewards of this dedication are well worth the effort. Soon, you’ll not just be making nigiri, but crafting edible works of art. Isn’t that a worthwhile pursuit?


