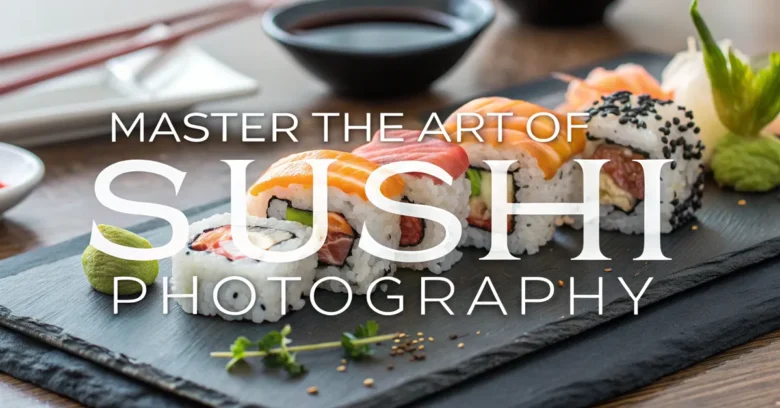
The vibrant colors, the intricate arrangements, the delicate textures – sushi is a feast for the eyes as much as it is for the palate. But capturing that visual essence in a photograph that truly does justice to the art of sushi? That’s a challenge that many food enthusiasts and bloggers face. More than half of all professional photographers find food photography to be one of their most difficult specialties. Don’t let that thought discourage you!
This article serves as your guide to mastering the art of food photography, specifically applied to sushi. You will learn how to use light, composition, and styling to create images that make mouths water and capture the very soul of this iconic Japanese dish. By the end, you’ll not only take great food photos but also be able to stand out from the crowd.
Understanding the Fundamentals of Food Photography
To take truly captivating sushi photos, it’s vital to grasp the core concepts of food photography. These go beyond simply pointing and shooting. It’s about creating an experience, a story, and a desire in the viewer.
The Importance of Lighting
Light is the single most crucial element in photography. It dictates the mood, highlights textures, and defines shapes. Getting it right can transform a simple snapshot into a stunning image. This is not just about how much light you have. It’s also about the quality and direction of the light.
-
Natural Light: Soft, diffused natural light is often the food photographer’s best friend. Position your sushi near a window, using a thin curtain or diffuser to soften harsh sunlight. This creates a gentle, even illumination that brings out the colors and textures of the sushi without harsh shadows. On a cloudy day, you already have great diffused light.
-
Artificial Light: When natural light is scarce, artificial light becomes essential.
- Continuous Lighting: This involves using a constant light source such as a softbox or LED panel. Softboxes are great for diffusing light and creating a larger, softer light source. LED panels offer adjustability and are energy efficient.
- Strobes/Flashes: These provide a burst of intense light and are useful for overpowering ambient light or creating dramatic effects. Use modifiers like softboxes or umbrellas to soften the flash and avoid harsh shadows.
-
Light Modifiers: These are tools that shape and control light.
- Diffusers: Soften and spread light evenly, reducing harsh shadows.
- Reflectors: Bounce light back onto the subject, filling in shadows and adding brightness. White foam boards or even aluminum foil can work as reflectors.
- Flags: Block light from certain areas, creating shadows and adding contrast.
Mastering Composition
Composition refers to the arrangement of elements within your frame. Good composition guides the viewer’s eye, creates visual interest, and tells a story.
-
Rule of Thirds: Imagine your frame divided into nine equal rectangles by two horizontal and two vertical lines. Placing key elements along these lines or at their intersections creates a balanced and visually appealing image.
-
Leading Lines: Use lines to draw the viewer’s eye towards the main subject. These could be chopsticks, the curve of a plate, or even the arrangement of the sushi itself.
-
Symmetry and Patterns: Symmetrical arrangements can create a sense of order and balance. Repeating patterns in sushi can also be visually striking.
-
Negative Space: The empty space around your subject can be just as important as the subject itself. It provides breathing room, emphasizes the main element, and creates a sense of calm.
-
Depth of Field: This refers to the area of your image that is in focus.
- Shallow Depth of Field: Creates a blurred background, drawing attention to a specific detail of the sushi. This works well for close-up shots.
- Deep Depth of Field: Keeps the entire scene in focus, showing the sushi in its context. This is suitable for wider shots and storytelling.
Styling Your Sushi
Styling is the art of arranging your subject to make it look its best. It involves choosing the right props, backgrounds, and garnishes to enhance the visual appeal of the sushi.
-
Choosing Props: Select props that complement the sushi without overpowering it. Consider items like:
- Wooden boards or sushi plates
- Chopsticks and chopstick rests
- Small bowls for soy sauce and wasabi
- Sake bottles or cups
- Bamboo mats or leaves
-
Selecting Backgrounds: The background should enhance the sushi, not distract from it. Consider using:
- Neutral-colored surfaces (white, gray, black)
- Natural materials (wood, stone)
- Textured fabrics (linen, burlap)
-
Adding Garnishes: Garnishes can add color, texture, and visual interest. Use them sparingly and thoughtfully.
- Edible flowers
- Microgreens
- Sesame seeds
- Thinly sliced ginger
- Lemon or lime wedges
Gear Up: Essential Equipment for Sushi Photography
While a professional camera can offer more control and higher image quality, you can still capture stunning sushi photos with a smartphone. The key is to understand the capabilities of your equipment and use it effectively.
Cameras and Lenses
- Smartphones: Modern smartphones have impressive cameras that are more than capable of capturing beautiful sushi photos. Look for phones with good low-light performance, manual controls, and the ability to shoot in RAW format.
- DSLRs and Mirrorless Cameras: These offer more control over settings like aperture, shutter speed, and ISO. They also allow you to use different lenses for various effects.
- Lenses:
- Macro Lens: Ideal for close-up shots, capturing intricate details of the sushi.
- Prime Lens (50mm or 35mm): Versatile and great for food photography, offering a natural perspective and good low-light performance.
- Zoom Lens: Provides flexibility in framing your shots, allowing you to zoom in or out without moving.
Tripods and Stabilizers
- Tripods: Essential for keeping your camera steady, especially in low-light conditions. They also allow you to use longer shutter speeds without blurring the image.
- Smartphone Tripods: Compact and affordable, these are designed specifically for smartphones.
- Gimbal Stabilizers: Offer smooth, stabilized shots, especially useful for video or when shooting handheld.
Lighting Equipment
- Reflectors: Bounce light back onto the subject, filling in shadows and adding brightness.
- Diffusers: Soften and spread light evenly, reducing harsh shadows.
- LED Panels: Provide continuous, adjustable light, useful for supplementing natural light or shooting in dark environments.
Setting the Scene: Composition and Storytelling
Great sushi photography isn’t just about capturing a pretty picture. It’s about telling a story and evoking emotions. This is achieved through careful composition and thoughtful styling.
Angles and Perspectives
-
Overhead Shot (Flat Lay): This angle is perfect for showcasing the arrangement of sushi on a plate or board. It provides a clean, graphic perspective.
-
45-Degree Angle: This is a classic food photography angle that shows the height and texture of the sushi. It creates a sense of depth and dimension.
-
Eye-Level Shot: This angle puts the viewer in the position of someone about to eat the sushi. It can create a sense of intimacy and immediacy.
Creating Mood and Atmosphere
- Color Palette: Choose a color palette that complements the sushi. Warm, earthy tones can create a cozy, inviting mood, while cool, muted tones can evoke a sense of sophistication.
- Props and Textures: Use props and textures to add depth and interest to your scene. Wooden boards, linen cloths, and ceramic bowls can all contribute to the overall mood.
- Depth of Field: Use shallow depth of field to isolate a specific element of the sushi, creating a sense of focus and intimacy. Use deep depth of field to show the sushi in its context, telling a broader story.
Showcasing the Sushi
- Highlighting Textures: Pay attention to the textures of the sushi – the smooth surface of the rice, the glossy sheen of the fish, the crispness of the seaweed. Use light to accentuate these textures, creating a tactile quality.
- Capturing Details: Get close and capture the intricate details of the sushi – the patterns of the fish, the arrangement of the ingredients, the delicate garnishes.
- Telling a Story: Think about the story you want to tell with your photo. Are you capturing a casual meal with friends, a romantic dinner, or a culinary masterpiece? Use composition, styling, and lighting to convey that story.
Camera Settings and Techniques
Understanding your camera settings and how to use them is key to achieving the desired results.
Mastering Manual Mode
- Aperture: Controls the amount of light entering the camera and affects the depth of field.
- Wide Aperture (e.g., f/1.8, f/2.8): Creates a shallow depth of field, blurring the background and isolating the subject.
- Narrow Aperture (e.g., f/8, f/11): Creates a deep depth of field, keeping the entire scene in focus.
- Shutter Speed: Controls the amount of time the camera’s sensor is exposed to light.
- Fast Shutter Speed (e.g., 1/200s, 1/500s): Freezes motion and reduces blurring.
- Slow Shutter Speed (e.g., 1/30s, 1/15s): Allows more light to enter the camera, useful in low-light conditions, but requires a tripod to avoid blurring.
- ISO: Controls the sensitivity of the camera’s sensor to light.
- Low ISO (e.g., ISO 100, ISO 200): Produces cleaner images with less noise.
- High ISO (e.g., ISO 800, ISO 1600): Allows you to shoot in low-light conditions, but can introduce noise and grain into the image.
White Balance
White balance ensures that colors are accurately rendered in your photos.
- Automatic White Balance (AWB): The camera automatically adjusts the white balance based on the scene.
- Preset White Balance: Choose a preset that matches the lighting conditions (e.g., daylight, cloudy, tungsten, fluorescent).
- Custom White Balance: Use a gray card or white object to manually set the white balance, ensuring accurate colors.
Focus and Sharpness
- Manual Focus: Allows you to precisely control the focus point, especially useful for close-up shots.
- Autofocus: The camera automatically focuses on the subject. Use single-point autofocus for greater precision.
- Focus Peaking: Highlights the areas of the image that are in focus, making it easier to achieve sharp focus.
Shooting in RAW
Shooting in RAW format preserves all the data captured by the camera’s sensor, giving you more flexibility in post-processing.
- Benefits of RAW:
- Greater dynamic range
- More control over white balance
- More flexibility in adjusting exposure and contrast
- No compression artifacts
Post-Processing Techniques
Post-processing is the final step in creating stunning sushi photos. It involves using software to adjust the image’s brightness, contrast, color, and sharpness.
Software Options
- Adobe Lightroom: A popular and powerful tool for editing and organizing photos.
- Adobe Photoshop: Offers more advanced editing capabilities, including layer-based editing and retouching.
- Capture One: A professional-grade photo editing software known for its excellent color handling.
- Snapseed (Mobile): A free and powerful mobile editing app with a wide range of tools.
- VSCO (Mobile): A popular mobile editing app with a focus on film-like presets.
Basic Adjustments
- Exposure: Adjust the overall brightness of the image.
- Contrast: Adjust the difference between the light and dark areas of the image.
- Highlights and Shadows: Adjust the brightness of the brightest and darkest areas of the image separately.
- Whites and Blacks: Adjust the white and black points of the image, affecting the overall tonal range.
Color Correction
- White Balance: Fine-tune the white balance to ensure accurate colors.
- Vibrance and Saturation: Adjust the intensity of the colors in the image.
- Hue: Adjust the individual colors in the image.
Sharpness and Clarity
- Sharpening: Increase the sharpness of the image, bringing out details.
- Clarity: Add definition and texture to the image.
Retouching
- Spot Removal: Remove blemishes, dust spots, and other imperfections.
- Cloning and Healing: Remove larger distractions by copying pixels from one area of the image to another.
Common Mistakes and How to Avoid Them
Even with the best equipment and techniques, it’s easy to make mistakes. Here are some common pitfalls to watch out for:
-
Poor Lighting: Avoid harsh, direct light or dim, uneven light. Use soft, diffused light to bring out the best in your sushi.
-
Cluttered Composition: Keep your composition clean and simple, avoiding distractions that detract from the sushi.
-
Unnatural Styling: Don’t over-style your sushi. Keep it looking fresh and appetizing, not artificial.
-
Incorrect White Balance: Make sure your colors are accurate by setting the white balance correctly.
-
Over-Processing: Avoid over-sharpening, over-saturating, or otherwise over-processing your images. Aim for a natural, realistic look.
Sushi Photography: Advanced Techniques and Tips
Once you’ve mastered the fundamentals, you can start experimenting with more advanced techniques to take your sushi photos to the next level.
Using Props to Tell a Story
Props can add context and depth to your images, helping you tell a story about the sushi and its origins. Consider using:
- Traditional Japanese Items: Sake bottles, tea cups, bamboo mats, and origami can evoke a sense of Japanese culture.
- Ingredients: Showcasing the raw ingredients used to make the sushi (fresh fish, seaweed, rice) can add a sense of authenticity.
- Tools: Chopsticks, knives, and cutting boards can suggest the process of making sushi.
Experimenting with Light
- Backlighting: Position your light source behind the sushi to create a glowing effect.
- Side Lighting: Position your light source to the side of the sushi to highlight textures and create shadows.
- Rim Lighting: Position your light source behind and slightly to the side of the sushi to create a bright outline around the edges.
Black and White Photography
Converting your sushi photos to black and white can create a dramatic and timeless effect. Pay attention to contrast and tonal range to bring out the textures and shapes of the sushi.
Using Motion
Adding motion to your sushi photos can create a sense of energy and excitement. Consider capturing:
- Pouring Soy Sauce: Capture the moment when soy sauce is poured over the sushi.
- Lifting Sushi with Chopsticks: Capture the sushi being lifted from the plate with chopsticks.
- Slicing Sushi: Capture the knife slicing through the sushi, showing its fresh ingredients.
Sushi Photo Shoot: Step-by-Step Guide
To put all of these concepts and techniques into action, here’s a step-by-step guide to planning and executing a sushi photo shoot:
- Plan Your Shoot: Decide on the style, mood, and story you want to convey. Choose your props, backgrounds, and lighting setup.
- Prepare the Sushi: Make sure the sushi is fresh and beautifully arranged. Add garnishes and details that enhance its visual appeal.
- Set Up Your Scene: Position your sushi, props, and backgrounds. Adjust your lighting to create the desired effect.
- Adjust Camera Settings: Set your aperture, shutter speed, ISO, and white balance according to the lighting conditions and your desired depth of field.
- Take Test Shots: Take a series of test shots, adjusting your settings and composition as needed.
- Shoot: Capture a variety of angles, perspectives, and compositions. Experiment with different lighting setups and styling options.
- Review Your Images: Review your images on your computer or mobile device, selecting the best ones for editing.
- Edit Your Images: Use post-processing software to adjust the brightness, contrast, color, sharpness, and other parameters.
- Share Your Photos: Share your stunning sushi photos on social media, your blog, or your website.
Is Mastering Sushi Photography Worth It?
Mastering sushi photography takes effort, practice, and a willingness to experiment. By grasping the fundamentals of light, composition, and styling, investing in the right equipment, and honing your post-processing skills, you can capture stunning images that do justice to the art of sushi. Start experimenting, and you’ll soon find your unique style.


