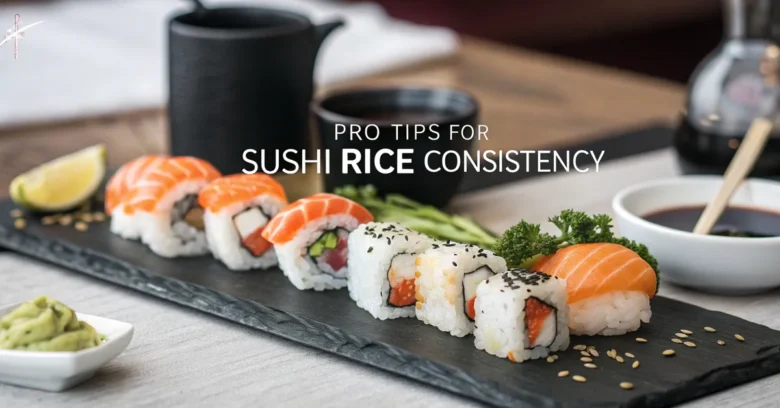
Is your sushi rice more hit-or-miss than a consistent culinary success? Achieving the perfect rice texture is the cornerstone of exceptional sushi. It’s the difference between a dish that delights and one that disappoints.
Perfecting sushi rice isn’t just about following a recipe. It’s about understanding the nuances of the process and mastering the techniques that ensure consistent results. We’re diving deep into the secrets of sushi rice, offering pro tips to elevate your home cooking.
Whether you’re a seasoned sushi enthusiast or a curious beginner, these insights will empower you to create sushi rice that rivals the best restaurants. Read on and become a rice master in no time.
The Foundation: Rice Selection and Preparation
Before we even think about cooking, let’s talk rice. Not all rice is created equal when it comes to sushi.
Choosing the Right Rice Variety
For authentic sushi rice, you want short-grain Japanese rice. Varieties like Koshihikari, Sasanishiki, or Calrose (California-grown, Japanese-style rice) are your best bet. These types have a higher starch content, specifically amylopectin, which gives the cooked rice its signature stickiness and ability to hold its shape. Avoid long-grain rice like Basmati or Jasmine; they won’t provide the desired rice texture.
The Essential Rinse: Removing Excess Starch
Rinsing the rice is a step you can’t skip. It gets rid of extra starch on the surface of the grains, which, if left unchecked, can lead to gummy or mushy rice. Here’s how to do it right:
- Place the rice in a large bowl and cover it with cold water.
- Using your hand, gently swirl the rice to release the starch. The water will turn cloudy.
- Drain the water completely.
- Repeat the process, gently rubbing the rice between your fingers, until the water runs mostly clear. This usually takes 4-6 rinses.
Why the gentle touch? Vigorous rubbing can break the grains, affecting the final texture.
Cooking Methods: Stovetop, Rice Cooker, and Beyond
Now for the main event: the cooking. There are multiple ways to cook sushi rice, but each method has its own best practices.
The Stovetop Method: Control and Precision
The stovetop method gives you maximum control over the cooking process. It requires a little more attention but yields excellent results.
- Rice to Water Ratio: Use a 1:1.1 ratio of rice to water. For example, 1 cup of rice to 1 1/8 cups of water. This ratio can vary slightly depending on your pot and stove, so adjust accordingly after a few tries.
- Bringing to a Boil: Place the rinsed rice and water in a heavy-bottomed pot with a tight-fitting lid. Bring it to a rapid boil over medium-high heat.
- Simmering: Once boiling, immediately reduce the heat to the lowest setting, cover the pot tightly, and simmer for 12 minutes. It is crucial that the lid stay on, otherwise the water will evaporate.
- Steaming: After 12 minutes, remove the pot from the heat and let it steam, covered, for another 10 minutes. This step is essential for the rice to fully absorb the remaining moisture and achieve the desired texture. Don’t peek!
The Rice Cooker Method: Convenience and Consistency
A rice cooker simplifies the process and offers consistent results.
- Following the Instructions: Add the rinsed rice and the amount of water listed in the rice cooker’s instruction manual. Most rice cookers have a designated water level for sushi rice.
- Cooking Cycle: Close the lid and start the cooking cycle.
- Keep Warm vs. Steaming: Once the cycle is complete, let the rice steam in the cooker for 10-15 minutes before opening the lid. Avoid using the “keep warm” function for extended periods, as it can dry out the rice.
Other Methods: Pressure Cooker and More
- Pressure Cooker: A pressure cooker can cook rice quickly, but it requires careful monitoring to avoid overcooking. Use the rice cooker ratio and follow your pressure cooker’s instructions for rice. Quick release the pressure and let the rice rest for 10 minutes before opening.
- Donabe (Japanese Clay Pot): Cooking rice in a donabe is a traditional method that imparts a unique flavor. The process is similar to the stovetop method, but the donabe’s heat retention properties help create evenly cooked rice.
The Sushi Vinegar: Flavor and Preservation
Sushi vinegar, or sushi-zu, is what gives sushi rice its characteristic flavor and helps preserve it.
The Classic Sushi Vinegar Recipe
The basic recipe consists of rice vinegar, sugar, and salt. The proportions are typically:
- 1/4 cup rice vinegar
- 2 tablespoons sugar
- 1 teaspoon salt
Variations: Sweetness, Tang, and Umami
You can adjust the sweetness and tang to your preference. Some chefs add a touch of sake or mirin for extra depth of flavor. A small piece of kombu (dried kelp) infused in the vinegar can also add umami.
The Mixing Process: Even Distribution
Heat the vinegar, sugar, and salt in a small saucepan over low heat, stirring until the sugar and salt are completely dissolved. Do not boil. Let it cool before using. This step ensures the ingredients are fully integrated.
Achieving the Perfect Texture: The Mixing and Cooling Process
This is where the magic happens, and the key to perfect rice texture is the proper mixing technique.
The Hangiri: A Traditional Tool
A hangiri is a wooden tub used for cooling and mixing sushi rice. The wood absorbs excess moisture, helping to achieve the ideal texture. If you don’t have a hangiri, a large, non-metallic bowl will work.
The Cutting Motion: Separating the Grains
Gently fold the vinegar mixture into the cooked rice using a cutting motion with a rice paddle (shamoji). Avoid stirring or mashing the rice, as this will make it mushy. The goal is to separate the grains and evenly coat them with the vinegar mixture.
Cooling the Rice: Gradual and Even
Fan the rice while mixing to help it cool quickly and evenly. This prevents the rice from continuing to cook and becoming too soft. The ideal temperature for sushi rice is slightly above room temperature, around 100°F (38°C).
Troubleshooting: Common Issues and Solutions
Even with the best techniques, problems can arise. Here’s how to tackle common issues:
Mushy Rice: Too Much Water
- Cause: Using too much water during cooking.
- Solution: Reduce the water ratio in future batches. If the rice is already mushy, try spreading it out on a baking sheet and gently drying it in a low oven (around 200°F or 93°C) for a short period.
Dry Rice: Not Enough Water
- Cause: Using too little water during cooking.
- Solution: Increase the water ratio in future batches. If the rice is already dry, you can try adding a small amount of water and steaming it again briefly.
Unevenly Cooked Rice: Inconsistent Heat
- Cause: Uneven heat distribution during cooking.
- Solution: Use a heavy-bottomed pot and ensure the heat is consistent. For rice cookers, make sure the cooker is level and functioning properly.
Gummy Rice: Insufficient Rinsing
- Cause: Not rinsing the rice thoroughly enough.
- Solution: Rinse the rice more vigorously in future batches until the water runs clear.
Advanced Techniques: Leveling Up Your Sushi Rice Game
Ready to take your sushi rice to the next level? Here are some advanced techniques to consider:
Aging Rice: Enhancing Flavor and Texture
Aging rice involves storing it for a period of time before cooking. This process can improve the flavor and texture of the rice. Store uncooked rice in a cool, dry place for a few months before using it for sushi.
Adjusting Water Levels Based on Rice Age
Older rice tends to be drier and may require slightly more water during cooking. Adjust the water ratio accordingly.
Experimenting with Vinegar Blends
Explore different types of rice vinegar and experiment with adding other ingredients like yuzu juice or brown sugar to create unique flavor profiles.
The Nigiri Test: Perfecting the Hand-Formed Shape
The ultimate test of sushi rice is its ability to hold its shape when formed into nigiri (hand-pressed sushi). The rice should be firm enough to stay together but delicate enough to melt in your mouth.
Maintaining Rice Quality: Storage and Handling
Proper storage and handling are crucial for maintaining the quality of your sushi rice.
Short-Term Storage: Preventing Drying
If you’re not using the rice immediately, keep it covered with a damp cloth to prevent it from drying out.
Long-Term Storage: Refrigeration Considerations
Refrigerating sushi rice can make it hard and dry. It’s best to avoid refrigeration if possible. If you must refrigerate, store the rice in an airtight container and reheat it gently with a small amount of water before using.
Reheating Techniques: Steaming vs. Microwaving
Steaming is the best method for reheating sushi rice, as it helps retain moisture. Microwaving can also work, but be sure to add a small amount of water and cover the rice to prevent it from drying out.
The Science Behind the Stickiness: Understanding Starch
The stickiness of sushi rice is all about starch. Short-grain Japanese rice has a high amylopectin content. When cooked, this starch gelatinizes, creating the characteristic stickiness that allows the rice to hold its shape.
Amylose vs. Amylopectin: The Key to Texture
Amylose and amylopectin are two types of starch found in rice. Amylose contributes to a firmer texture, while amylopectin contributes to stickiness. Sushi rice varieties are higher in amylopectin, resulting in a stickier, more cohesive texture.
Gelatinization: The Cooking Process
Gelatinization is the process by which starch granules absorb water and swell during cooking. This process is essential for creating the desired texture in sushi rice.
Retrogradation: The Staling Process
Retrogradation is the process by which starch molecules realign and crystallize as the rice cools, leading to a firmer, drier texture. This is why sushi rice is best served slightly warm and should be consumed shortly after preparation.
Regional Variations: Exploring Sushi Rice Across Japan
Sushi rice preparation can vary across different regions of Japan, reflecting local preferences and ingredients.
Kanto Style: Stronger Vinegar Flavor
In the Kanto region (Tokyo), sushi rice tends to have a stronger vinegar flavor and a slightly firmer texture.
Kansai Style: Milder Vinegar Flavor
In the Kansai region (Osaka, Kyoto), sushi rice often has a milder vinegar flavor and a slightly softer texture.
Local Rice Varieties: Adapting to Regional Tastes
Different regions may also use local rice varieties, each with its own unique characteristics.
Sushi Rice and Health: Nutritional Considerations
Sushi rice is primarily a source of carbohydrates. It also provides some vitamins and minerals.
Glycemic Index: Understanding Blood Sugar Impact
The glycemic index (GI) of sushi rice is moderately high, meaning it can cause a relatively rapid increase in blood sugar levels.
Portion Control: Maintaining a Balanced Diet
Be mindful of portion sizes when consuming sushi rice, especially if you have diabetes or are watching your carbohydrate intake.
Brown Rice Sushi: A Healthier Alternative?
Using brown rice for sushi can increase the fiber content and lower the glycemic index. However, brown rice can be more challenging to work with and may not have the same texture as traditional sushi rice.
Sushi Rice Around the World: Adaptations and Innovations
Outside of Japan, sushi rice has been adapted and modified to suit local tastes and available ingredients.
California Roll: A Western Twist
The California roll, with its avocado and crab filling, is a classic example of a Western adaptation of sushi.
Fusion Cuisine: Creative Combinations
Many sushi restaurants around the world offer fusion cuisine, combining sushi rice with ingredients and flavors from other cultures.
Alternative Grains: Quinoa and Beyond
Some chefs are experimenting with alternative grains like quinoa or forbidden rice to create unique and healthy sushi options.
The Equipment You’ll Need for Great Sushi Rice
While you can make sushi rice with basic kitchen tools, some specialized equipment can make the process easier and more efficient.
Rice Cooker vs. Stovetop: Which Is Best?
A rice cooker offers convenience and consistency, while the stovetop method gives you more control. The best choice depends on your personal preferences and cooking style.
Hangiri vs. Mixing Bowl: The Cooling Process
A hangiri is ideal for cooling and mixing sushi rice, but a large, non-metallic bowl will work as a substitute.
Shamoji: The Rice Paddle
A shamoji is a flat, wooden paddle used for mixing and serving sushi rice. Its shape is designed to prevent the rice from being crushed or mashed.
Measuring Cups and Spoons: Accuracy Matters
Accurate measurements are essential for achieving the correct rice-to-water ratio and sushi vinegar proportions.
Perfecting Your Technique: Practice and Patience
Like any culinary skill, mastering sushi rice takes practice and patience. Don’t be discouraged if your first few batches aren’t perfect. Keep experimenting, adjusting your techniques, and paying attention to the details. With time and effort, you’ll be able to consistently create sushi rice that delights your taste buds and impresses your friends and family. The key is to keep practicing!
Is Fluffy, Flavorful Rice Worth the Fuss?
Yes! Achieving the perfect rice texture and flavor for sushi is absolutely worth the effort. It’s the foundation of exceptional sushi and can elevate your home cooking to restaurant-quality standards. So, embrace the process, experiment with different techniques, and enjoy the journey of becoming a sushi rice master. Good luck!